Bathroom layout: getting the floor plan right
The bathroom layout decision that shifts your renovation budget by thousands: five floor plans, fixture clearances, wet-wall rules and Australian code requirements.
Layout is the single most expensive decision in the room
Most bathroom advice online starts with finishes. Pick the tile, pick the tapware, choose a vanity, build a moodboard. The layout shows up later, treated as a constraint to work around rather than a decision to make properly. That order is backwards. Layout is the single most expensive decision in a bathroom, and it is also the only one that is effectively permanent. You can change a vanity in a weekend. You can re-tile in a week. Moving the toilet to the opposite wall is structural work that touches waterproofing, plumbing, the slab or the floor structure, and weeks of trade time.
The cost gap between a layout that fits the existing plumbing and a layout that does not is large. The wider trade rule of thumb is that keeping the existing footprint costs 20 to 30 per cent less than a relocated layout for an equivalent finish. The HIA Kitchens and Bathrooms data has the national average bathroom renovation spend at about $26,000 in 2024, which means the layout decision alone moves the budget by roughly $5,000 to $8,000 in either direction. It is the single highest-leverage choice in the project.
This guide is the layout-only piece. The wider bathroom renovation guide covers the full project from brief to handover; the small bathroom design guide goes deep on compact rooms specifically. This page sits one level above both: it covers how to read your room, pick a layout that suits it, lock the fixture clearances, plan the wet wall and clear the Australian code requirements before you order a single tile. If you do this part well, the rest of the renovation gets cheaper, faster and better.
Start with the room you have, not the layout you want
Before any decision about which layout to use, you need three numbers about the existing room: the wall-to-wall width, the wall-to-wall length, and the position of the existing soil stack or sewer connection. Measure twice. Old houses are rarely square, and a 50 mm slope across the long wall can be the difference between a 900 mm shower fitting and a 900 mm shower not fitting.
The width number sets the layout floor. Australian bathroom widths cluster between roughly 1.6 m and 2.4 m. Below about 1.7 m you are confined to a three-in-a-row on a single wall; opposing-wall layouts no longer leave a workable walkway. From 1.8 m up, galley layouts start to work. From 2.0 m up, L-shape becomes the most generous option for a roughly square room. Above 2.4 m, the walk-in shower plus freestanding bath layout enters the conversation if the length is also generous.
The length number then constrains how many fixtures will fit. As a working rule, a single fixture needs about 900 mm of length along the wall (a 900 mm vanity, a 900 mm shower or a 700 mm toilet pan plus circulation). Three fixtures on one wall therefore needs roughly 2.7 to 3.0 m of clear length. Anything shorter and either the vanity shrinks to 600 mm, the shower drops to 800 by 800 mm, or one fixture moves to a different wall.
The soil stack position is the most overlooked number. Toilets connect to a 100 mm soil pipe that drops vertically through the floor structure to either a stack or directly to the sewer. The position of that pipe was set when the house was built, and it runs at a fixed fall (typically 1 in 60 to 1 in 100) toward the connection point. Wherever the pipe currently sits is the cheapest place for the toilet to be, full stop. Moving it adds a plumber day, a tiler return visit, structural work where the slab or joists are cut, and patching afterwards. On a concrete slab on ground the move is significantly worse: cutting and re-pouring is structural work that may need an engineer.
Once you have those three numbers, you can start matching the room to a layout rather than the other way around.
Most Australian bathrooms sit inside houses, not apartments
The dwelling you are renovating shapes what is possible. In a freestanding house with timber floors, almost any layout change is technically achievable, even if some are expensive. In a slab-on-ground house the cost of moving the toilet roughly doubles. In an apartment, the strata regime and the building’s plumbing risers narrow the options further; the fixture you can move is limited to wherever the existing waste stack and water rough-ins already are.
According to the 2021 ABS Census of Population and Housing, Australia had 10.85 million private dwellings, with separate houses accounting for 70 per cent, apartments 16 per cent and townhouses or semi-detached units 13 per cent. The implication for layout decisions is straightforward: most Australians live in a building type where the layout is technically wide-open, but the cost of changing it is the deciding factor; one in six lives in an apartment where strata rules and shared services are the deciding factor, regardless of cost.
- Houses7,60071%
- Apartments1,74016%
- Townhouses1,41013%
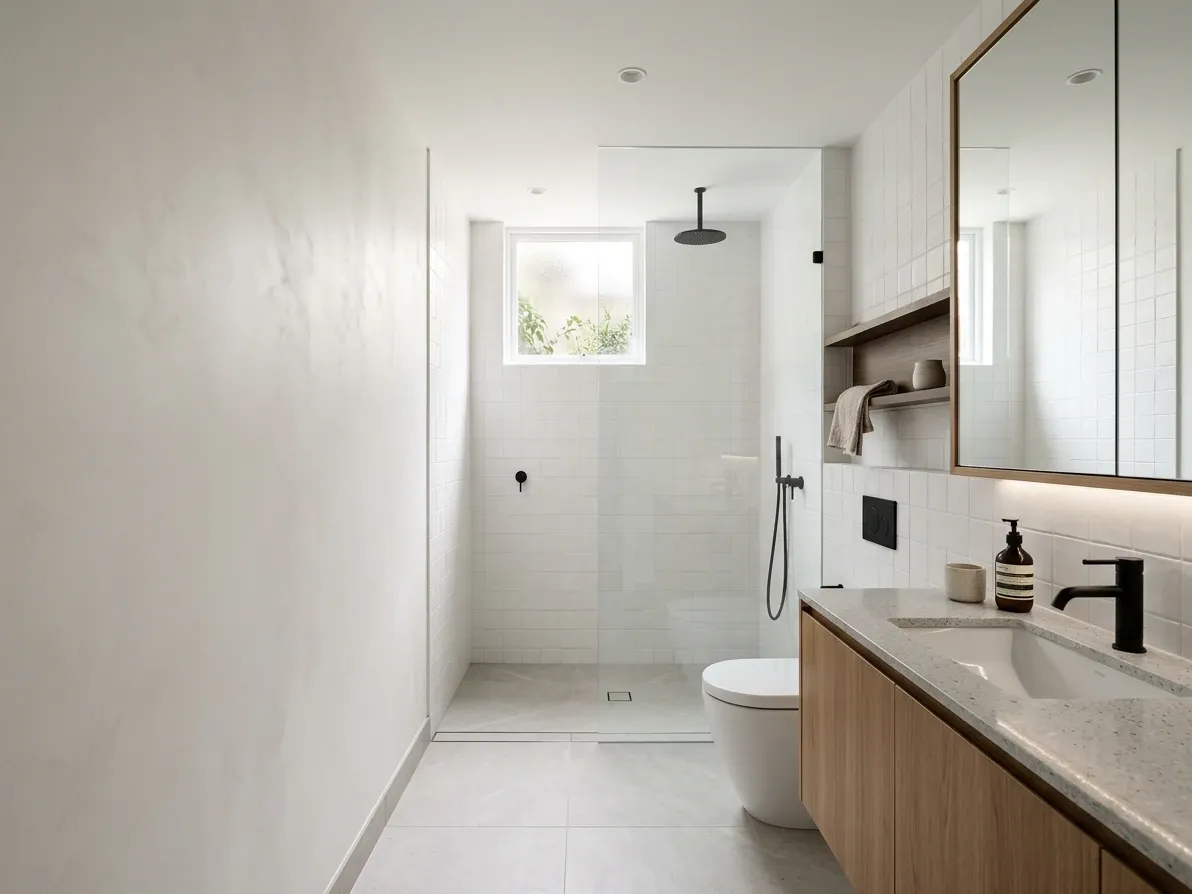
Three-in-a-row: every fixture on one wet wall.
Match the layout to the room shape
There are five working bathroom layouts in Australian residential design. Each one is matched to a specific room shape and a specific use case. Choosing the wrong layout for the room is the second-most-common reason a renovated bathroom does not feel right.
Three-in-a-row (single wet wall)
The three-in-a-row puts the vanity, toilet and shower along one wall in some order, with the opposite wall left clear. The classic Australian arrangement is vanity at the door end, toilet central, shower at the far end behind a frameless glass screen or a half-height nib wall. All the plumbing sits on one wet wall.
It is the most space-efficient layout and the cheapest to plumb. Because every fixture connects to the same wet wall, the plumber’s labour is concentrated, the waterproofing run is short and the tile labour is contained. Three-in-a-row is the dominant layout in Australian apartments, in townhouses, in granny flats and in older detached houses where the original 1960s and 1970s bathrooms followed the same pattern.
The trade-off is that the room reads as a corridor. A 1.5 m wide three-in-a-row 3 m long will feel like a hallway with fixtures along one side. The fix is to make the dry wall do visual work: oversized tile, a full-wall mirror behind the vanity, a feature pendant centred over the open floor. Treat the dry wall as part of the design, not a leftover.
Best for rooms 1.5 to 1.8 m wide and at least 2.4 m long. Best for apartment ensuites, narrow main bathrooms in terrace and townhouse stock, and any renovation where keeping the wet wall is non-negotiable for cost.
Galley
A galley puts two parallel fixture runs on opposing walls, typically vanity on one side, shower and toilet on the other. The walkway down the middle is the negotiated dimension: at least 900 mm to feel comfortable, 1000 to 1100 mm to feel generous.
Galley layouts shine when the room has a window or natural light on one of the short walls, because the eye is drawn down the room to the light rather than across it. They also handle two-user bathrooms better than three-in-a-row, because two people can stand at opposing fixtures (vanity and shower, or vanity and toilet) without colliding.
The plumbing cost is higher than three-in-a-row because there are two wet walls, but the increase is modest as long as both walls share the same drainage path under the floor. Where galley layouts get expensive is when the wet walls are at opposite ends of the room from the soil stack, which forces a long underfloor run.
Best for rooms 1.8 to 2.2 m wide and 2.6 to 3.5 m long. Best for family bathrooms where the kids brush teeth at one basin while a parent showers, and for main bathrooms in 1980s and 1990s detached homes built with rectangular bathrooms in mind.
L-shape
An L-shape uses two adjoining walls in a corner. The most common Australian arrangement is shower in the corner, vanity running along one adjoining wall, toilet on the other adjoining wall or set behind a half-height nib that creates a small zone for it.
L-shape feels more generous than any other layout in a roughly square room because the wet zone is concentrated in one corner and the rest of the room reads as open floor. It also handles privacy zoning well: the toilet can be screened by a nib wall without losing access to the basin.
The plumbing cost is similar to galley, with two wet walls. The two adjoining walls usually drain back to the same stack, so the underfloor run stays short.
Best for rooms 2.0 to 2.5 m wide and roughly square. Best for ensuites where the door enters near the corner and the user wants the open floor on the entry side, and for main bathrooms in newer detached homes built with squarish bathroom footprints.
Bath-shower combo
A bath-shower combo stacks the shower over a 1500 to 1700 mm bath, with a fixed glass panel rather than a curtain. The vanity and toilet sit elsewhere in the room, usually on adjoining walls. The bath becomes the wet zone for both bathing and showering.
This is the pragmatic family bathroom layout for any room that cannot fit a separate bath and shower side by side. It is the dominant arrangement in Australian apartments where the bathroom footprint is under 5 m², and in older suburban homes where the bath was the original fixture and a shower was added over it later.
The compromise is real. Standing in a tub to shower never feels right, the glass panel never seals as cleanly as a screen door on a dedicated shower, water sits at your feet on the bath rim, and stepping in and out of a wet 400 mm-tall tub edge is the most common bathroom injury for older people. Keep this layout only if the bath is genuinely used.
Best for rooms 1.8 to 2.4 m wide where a bath is essential and floor area is short. Best for family bathrooms with young kids who use the bath, for investment properties where a bath helps with resale, and for compact apartment bathrooms.
Walk-in shower with freestanding bath
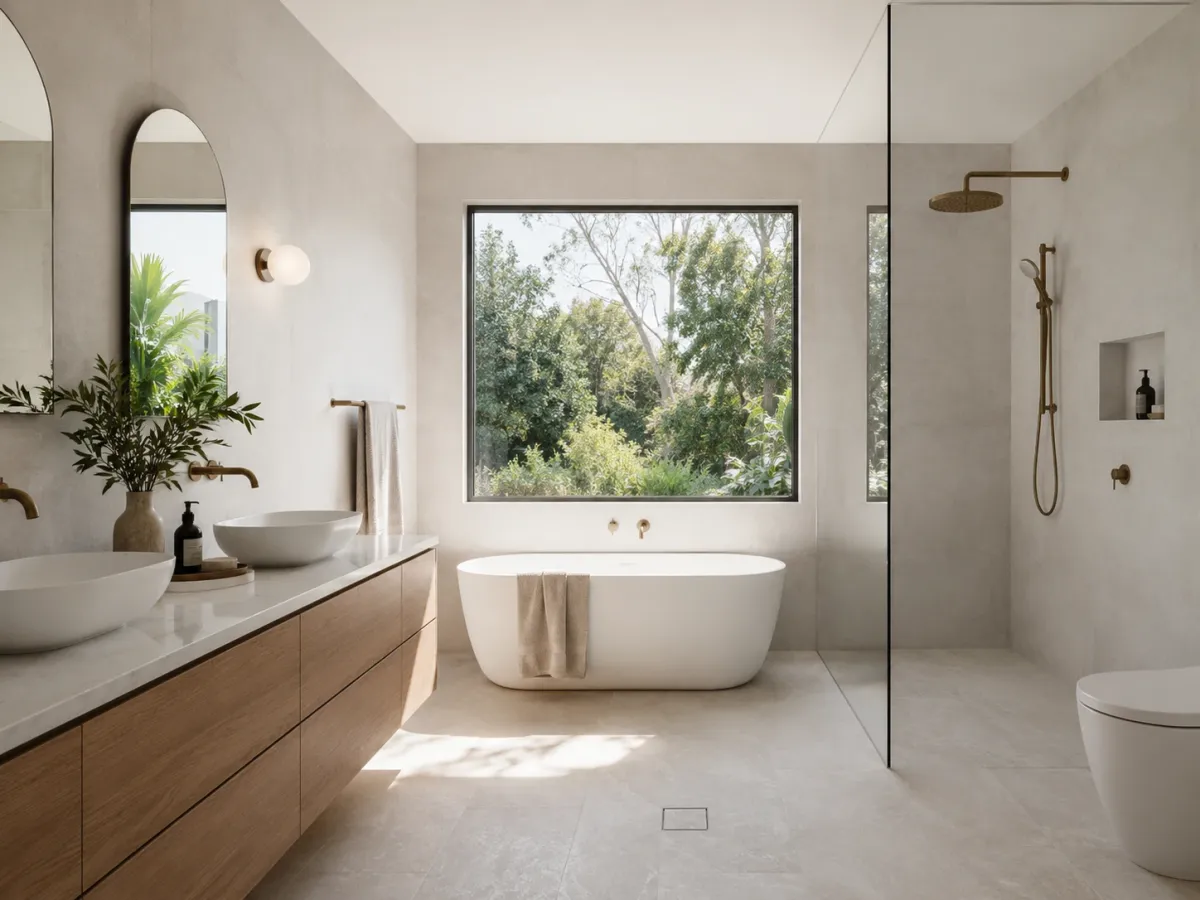
A walk-in shower with a freestanding bath is the dominant aspirational layout in any main bathroom or ensuite over about 6 m². A 1000 to 1200 mm hobless walk-in shower sits at one end of the room, a freestanding bath occupies its own zone, a long wall-hung vanity (often double basin) runs along one wall, and the toilet sits behind a partition or in a separate WC.
This layout is what most 2026 mid-range and premium Australian renovations are aiming at. The hobless shower keeps the floor visually continuous, the freestanding bath becomes the room’s hero piece, and the long vanity carries enough storage to retire the medicine cabinet.
The cost is real. Freestanding baths need their own plumbing connections, which usually means a feed run to the centre of the room and a waste in the floor rather than tucked against a wall. The hobless shower needs a precisely-graded floor and tighter waterproofing. The vanity is custom or semi-custom because off-the-shelf wall-hung units rarely run beyond 1500 mm. Premium ensuites in Sydney routinely run past $50,000 for this layout.
Best for rooms 2.4 m+ wide and 3.5 m+ long, in detached homes or larger apartments. Best for main bathrooms, master ensuites in renovated detached homes, and luxury apartment ensuites where the budget supports the layout.
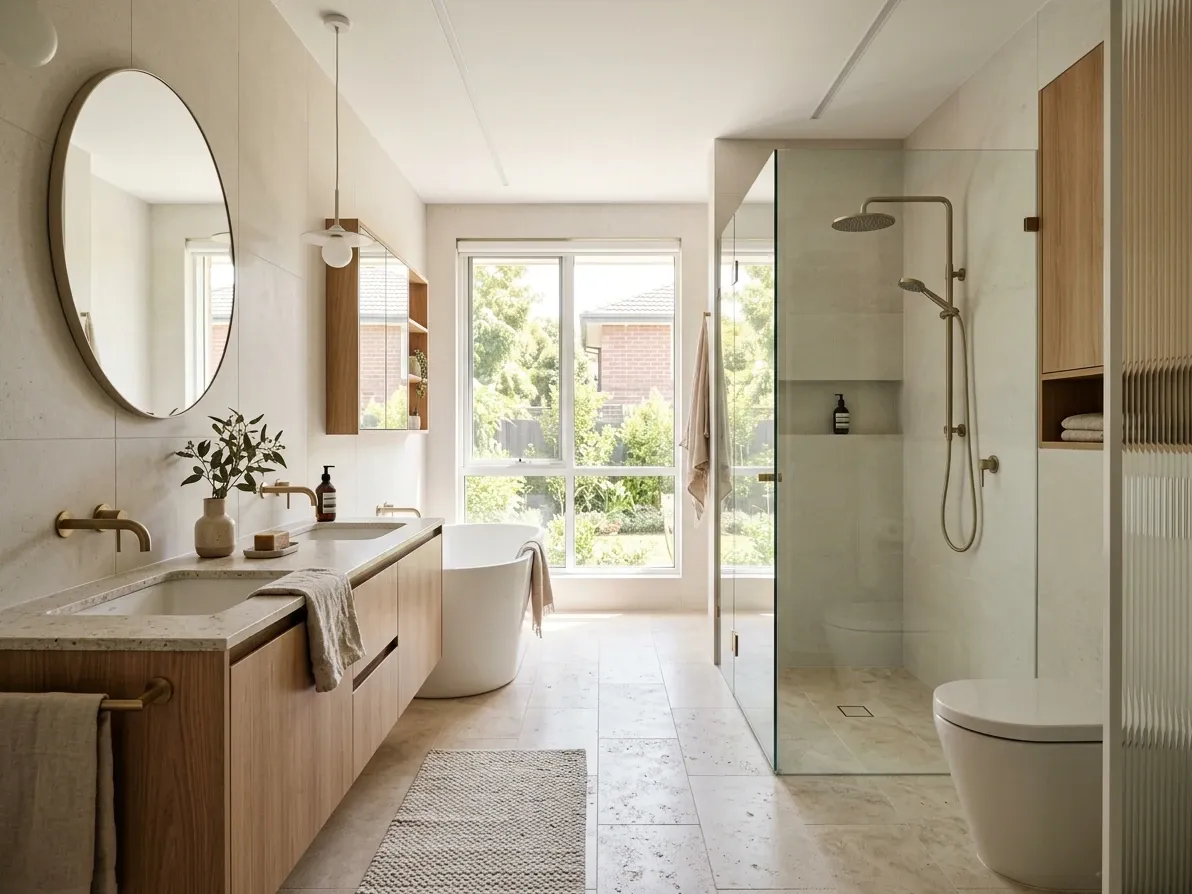
A galley layout works above 1.8 m wide.
Lock the fixture clearances before the layout is final
Every Australian bathroom layout has to clear the same set of minimum fixture clearances. These are not building code numbers in the sense that the council inspects them; they are the planning conventions that the trade has settled on because anything smaller does not work in practice. A bathroom that ignores them will feel cramped no matter how good the finishes are.
For the toilet, the centre of the pan should sit at least 450 mm from the nearest side wall or fixture, giving an overall toilet zone of 900 mm wide. In front of the pan, allow at least 530 mm of clear floor; 760 mm is the comfortable target. The toilet roll holder sits 200 to 300 mm in front of the pan and 600 to 800 mm above the floor. A wall-hung pan saves roughly 150 to 200 mm of floor depth compared to a floor-mounted suite, because the cistern moves into the wall cavity.
For the vanity and basin, allow at least 700 mm of clear floor in front of the basin for comfortable use, and 300 mm side clearance from the basin centreline to the nearest wall or fixture. Standard vanity depth is 500 to 600 mm. Standard vanity height is 850 to 900 mm from finished floor to benchtop. Wall-hung vanities sit roughly 200 mm above the floor, which makes the room read larger because the eye can travel under the unit.
For the shower, 900 by 900 mm is the comfortable minimum. 800 by 800 mm works in tight rooms but feels small in use. 1000 by 1000 mm or 1200 by 900 mm is the comfortable size for a walk-in shower with a frameless screen. A hobless shower needs the floor graded to fall toward the drain at 1 in 80 minimum, which the tiler sets during the screed. The waterproofed wall lining must run to 1800 mm above the floor or 50 mm above the shower rose, whichever is higher, per AS 3740:2021 waterproofing of domestic wet areas.
For a standard bath, the minimum footprint is 1500 by 700 mm. Most Australian baths are 1500 to 1700 mm long. Freestanding baths add 100 to 200 mm of clear floor on every side and need their plumbing brought up through the floor or run inside a hob.
For the door, the minimum clear opening for a residential bathroom is 720 mm, with 820 mm preferred. The accessible reference under AS 1428.1 is 850 mm clear. If the room is tight or accessibility matters, a cavity slider reclaims the swing arc entirely.
Once you have a layout sketch and these clearances drawn in, walk through the morning routine in your head. Stand at the basin and brush your teeth. Sit on the toilet and reach for the roll. Step out of the shower and grab the towel. If any of those movements feels tight on paper, it will feel tight in the finished room.
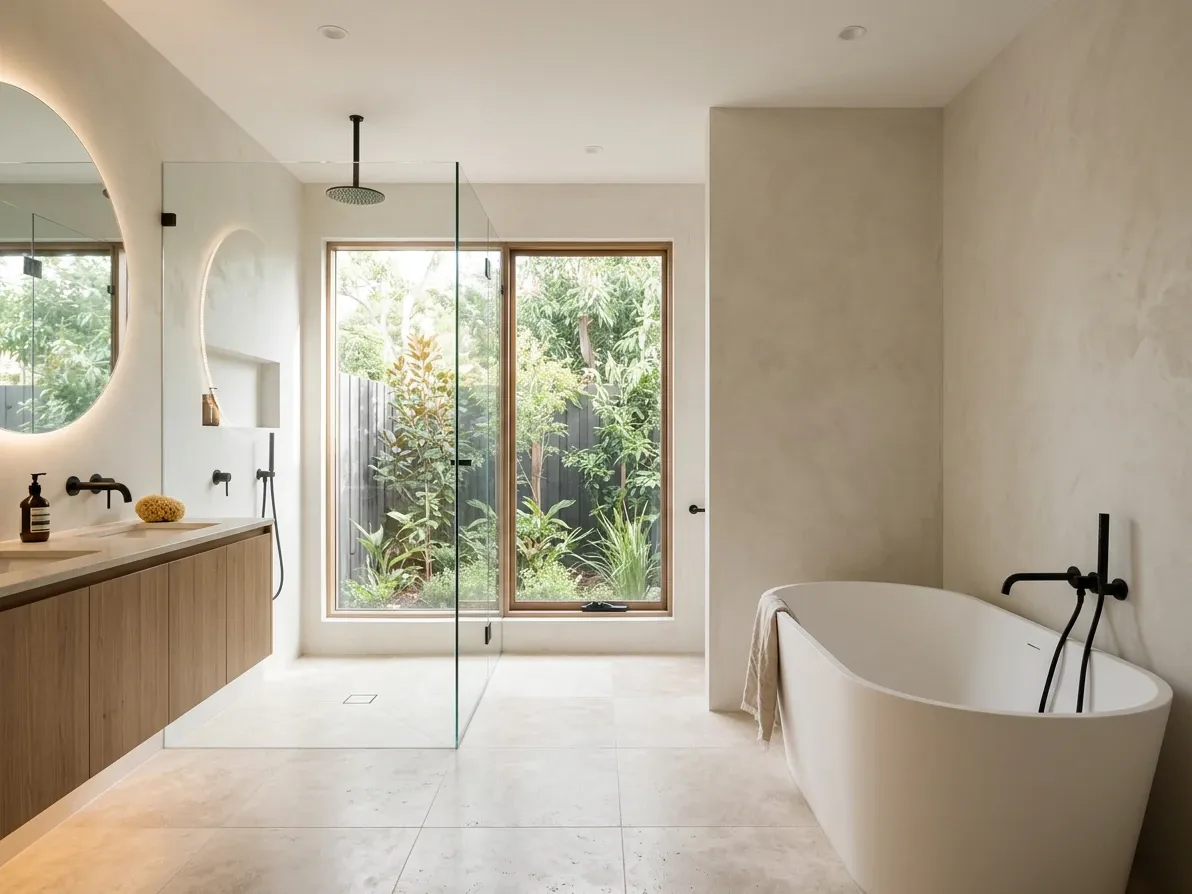
A separate shower and freestanding bath needs more plumbing.
The wet wall is where the money is
The single largest layout-driven cost variable is the position of the wet wall. The wet wall is the wall that carries the supply lines, the drains and the vent stack. In a freestanding house it is typically the wall closest to the existing plumbing rough-in or the stack. In an apartment it is the wall closest to the riser shaft. In every dwelling type, building the bathroom with one wet wall is significantly cheaper than building it with two, and building it with two is cheaper than three.
Three-in-a-row has one wet wall. Galley and L-shape have two. The walk-in shower plus freestanding bath layout effectively has two and a half because the freestanding bath needs its own plumbing reach into the middle of the room. The price implication is mechanical: the plumber’s labour is concentrated against fewer walls, the waterproofing is contained, and the wall tiling and patching reduces proportionally.
Layout changes that look small can be expensive if they cross the wet wall. Moving the toilet from one end of a single wet wall to the other costs almost nothing because the soil pipe runs along the same wall. Moving the toilet to a different wall is a full stack relocation: cut the floor structure, re-run the 100 mm soil pipe at the correct fall back to the original stack, re-frame and re-tile. On a timber floor expect a plumber day, a tiler return visit and structural patching. On a concrete slab on ground, expect saw-cutting, re-pouring, engineer sign-off and a working week of additional trade time.
The cheapest layout in your specific room is the layout that keeps everything on the existing wet wall. The most expensive is the layout that puts a fixture on the wall furthest from it. Every other decision in the project bends around that one.
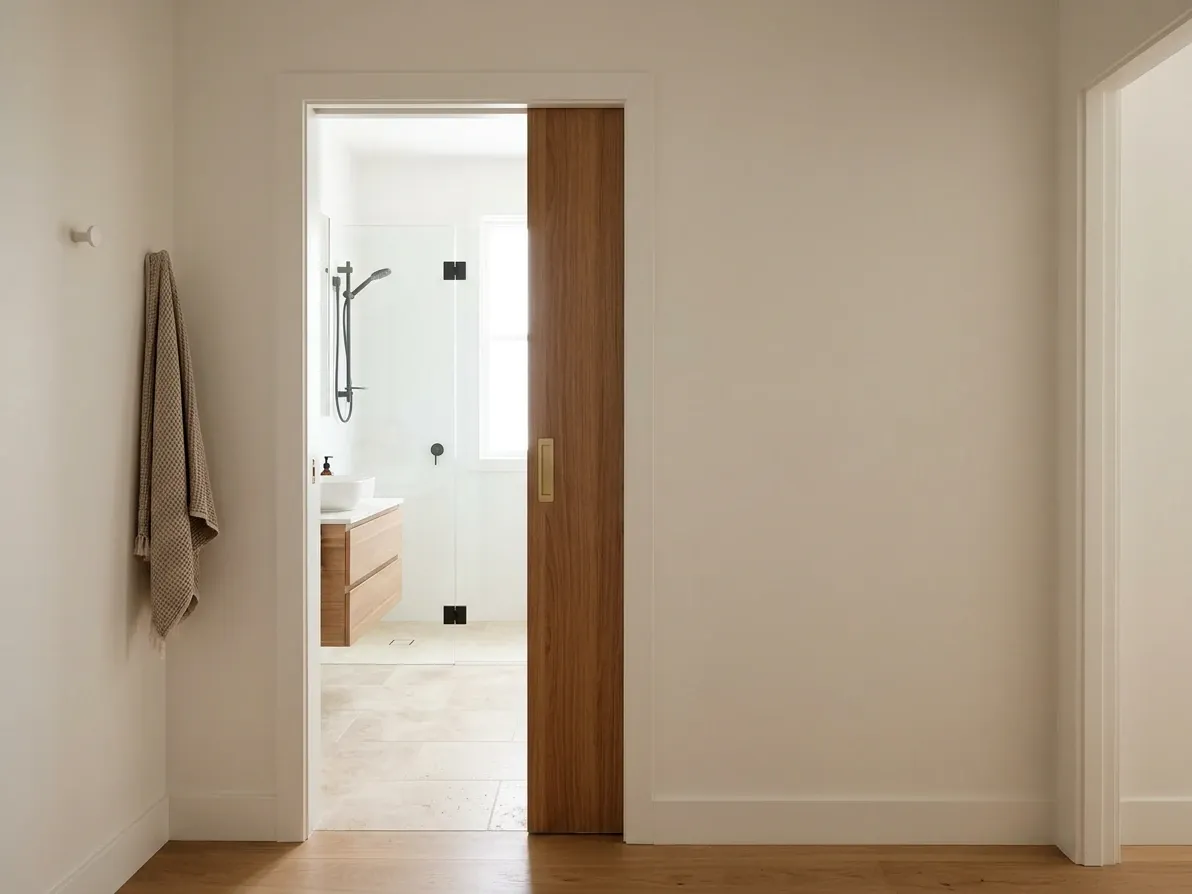
A cavity slider reclaims the swing arc entirely.
Door swing and circulation set the room’s feel
A bathroom that hits all its clearances on paper can still feel wrong if the door swing and the circulation paths are not resolved. Walk-through movement and door arc are part of the layout, not finish-level details.
Australian residential guidance prefers outward-swinging or sliding bathroom doors because an inward-swinging door eats roughly a square metre of floor inside the room (the swing arc plus the dead space behind the open door). In a room under about 5 m² that floor area is a meaningful fraction of the total. There is also a safety case: if someone falls inside the bathroom, an inward-swinging door can be blocked by them. The code trigger that catches the worst cases is the 1200 mm rule: if the gap between the toilet pan and the door is less than 1200 mm in front, the door should slide, be removable from outside, or swing outwards.
In tight rooms a cavity slider is the cleanest answer. It reclaims the full swing arc and reads as architectural rather than added on. The cost penalty is real: a cavity slider needs a stud cavity to slide into, which means losing the use of that wall for storage, towel rails or a wet wall behind it. Plan for it during framing, not after.
The walkway between opposing fixtures in a galley or L-shape needs to be at least 900 mm to feel comfortable, with 1000 to 1100 mm being the generous target. Below 900 mm the room feels like a corridor; below 800 mm two people cannot pass each other.
Circulation also matters for the door arc into the basin. A door that swings inward and clips the front of the vanity is a layout problem, not a door problem. Either the vanity moves further from the door (which usually means a smaller vanity), the door swings outward (which usually means a hinge change), or the door becomes a slider.
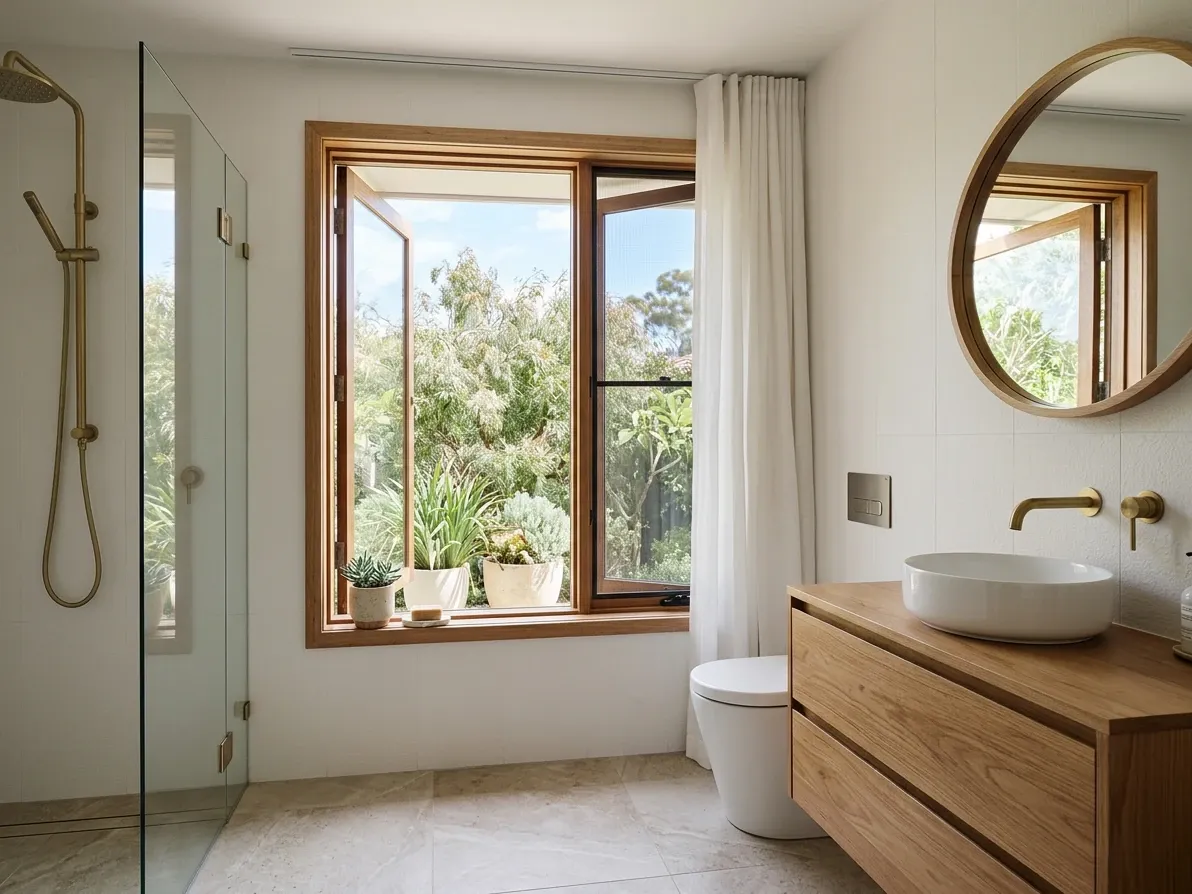
A window of at least 5 per cent of floor area meets the NCC.
Plan for the Australian code requirements that affect layout
A handful of NCC and Australian Standard requirements directly affect layout decisions. They are non-negotiable, they are inspected, and they should be checked at the layout stage rather than during the build when redesigning is expensive.
Ceiling height. Bathrooms are classed as service areas under the NCC and need a finished floor-to-ceiling height of at least 2.1 m over at least two-thirds of the floor area, per the NCC 2022 housing provisions on room heights. In attic conversions or under-stair powder rooms this is the constraint that catches you out.
Waterproofing. The entire shower wall lining must be waterproofed to a minimum height of 1800 mm above the finished floor level or 50 mm above the shower rose, whichever is higher, under AS 3740:2021. Floors must fall toward the drain. The work must be done by a licensed waterproofer and signed off. The layout implication is straightforward: a wet zone that crosses two walls roughly doubles the waterproofed area compared with a single-wet-wall layout, which is part of the cost gap between three-in-a-row and galley.
Ventilation. Bathrooms need either a window with an openable area of at least 5 per cent of the floor area, or mechanical exhaust at 25 litres per second discharging directly outside through a duct, per NCC Housing Provisions Part 10.6. The 2022 update closed the old loophole that let exhaust fans discharge into a ventilated roof space. If the room has no window, the fan must be interlocked with the light switch and have a run-on timer, and the door usually needs a 20 mm undercut for make-up air. The layout implication is that internal bathrooms (a bathroom with no external wall) need a dedicated duct run, which has to be planned at the framing stage rather than retrofitted.
Strata approval. New South Wales strata law classifies any bathroom renovation that touches waterproofing as a major renovation, requiring a special resolution of the owners corporation. That is a vote at a general meeting with at least 75 per cent support. Plan for six to twelve weeks of approval lead time before any trade hits the building. Victoria treats bathroom tiles and waterproofing membranes as lot property in most cases, so the requirement is significantly looser. Either way, the strata layer is the second approver after council, and the layout decision should be checked against the building’s by-laws before quoting.
Accessibility. AS 1428.1 is the Australian accessibility standard. It applies in full to public and commercial buildings and is the reference for residential ageing-in-place design. Key references: a clear door opening of at least 850 mm, grab rails at 800 to 810 mm above the floor rated to 110 kg, a slip-resistant floor surface, and clear floor space inside the room of at least 1540 by 2070 mm for wheelchair turning. If anyone in the household is likely to need accessibility features within the bathroom’s expected ten- to fifteen-year life, the time to plan for them is now: blocking inside the wall framing for future grab rails costs almost nothing during construction and is significantly disruptive to add later.
How floor area actually distributes in a small bathroom
Once the layout is sketched and the clearances are drawn in, it is worth understanding how the floor area actually distributes. In a typical 6 m² Australian bathroom, fixtures consume less of the floor than people expect, and circulation consumes more. The implication is that the room’s perceived size is driven less by fixture choice and more by how much continuous floor is left between them.
- Shower zone1017%
- Bath1118%
- Vanity zone610%
- Toilet zone58%
- Clear floor2847%
This is why a three-in-a-row in a narrow room feels tighter than its floor area suggests: the fixtures are concentrated along one wall, but the clear circulation runs through a long thin strip rather than as an open zone. It is also why an L-shape often feels more generous than a galley with the same square metreage: the L-shape pools its circulation in one corner of the room rather than stretching it down the length.
The other implication is for storage planning. Vanity depth is set by the basin, but vanity width is the variable, and a 900 mm vanity in a small bathroom is the right number for most households. Wider vanities eat circulation faster than they add storage. The right place to add storage in a small bathroom is vertical: a tall column on the dry wall, mirrored cabinetry above the vanity, niches inside the shower wall. Wide is where you lose the room.
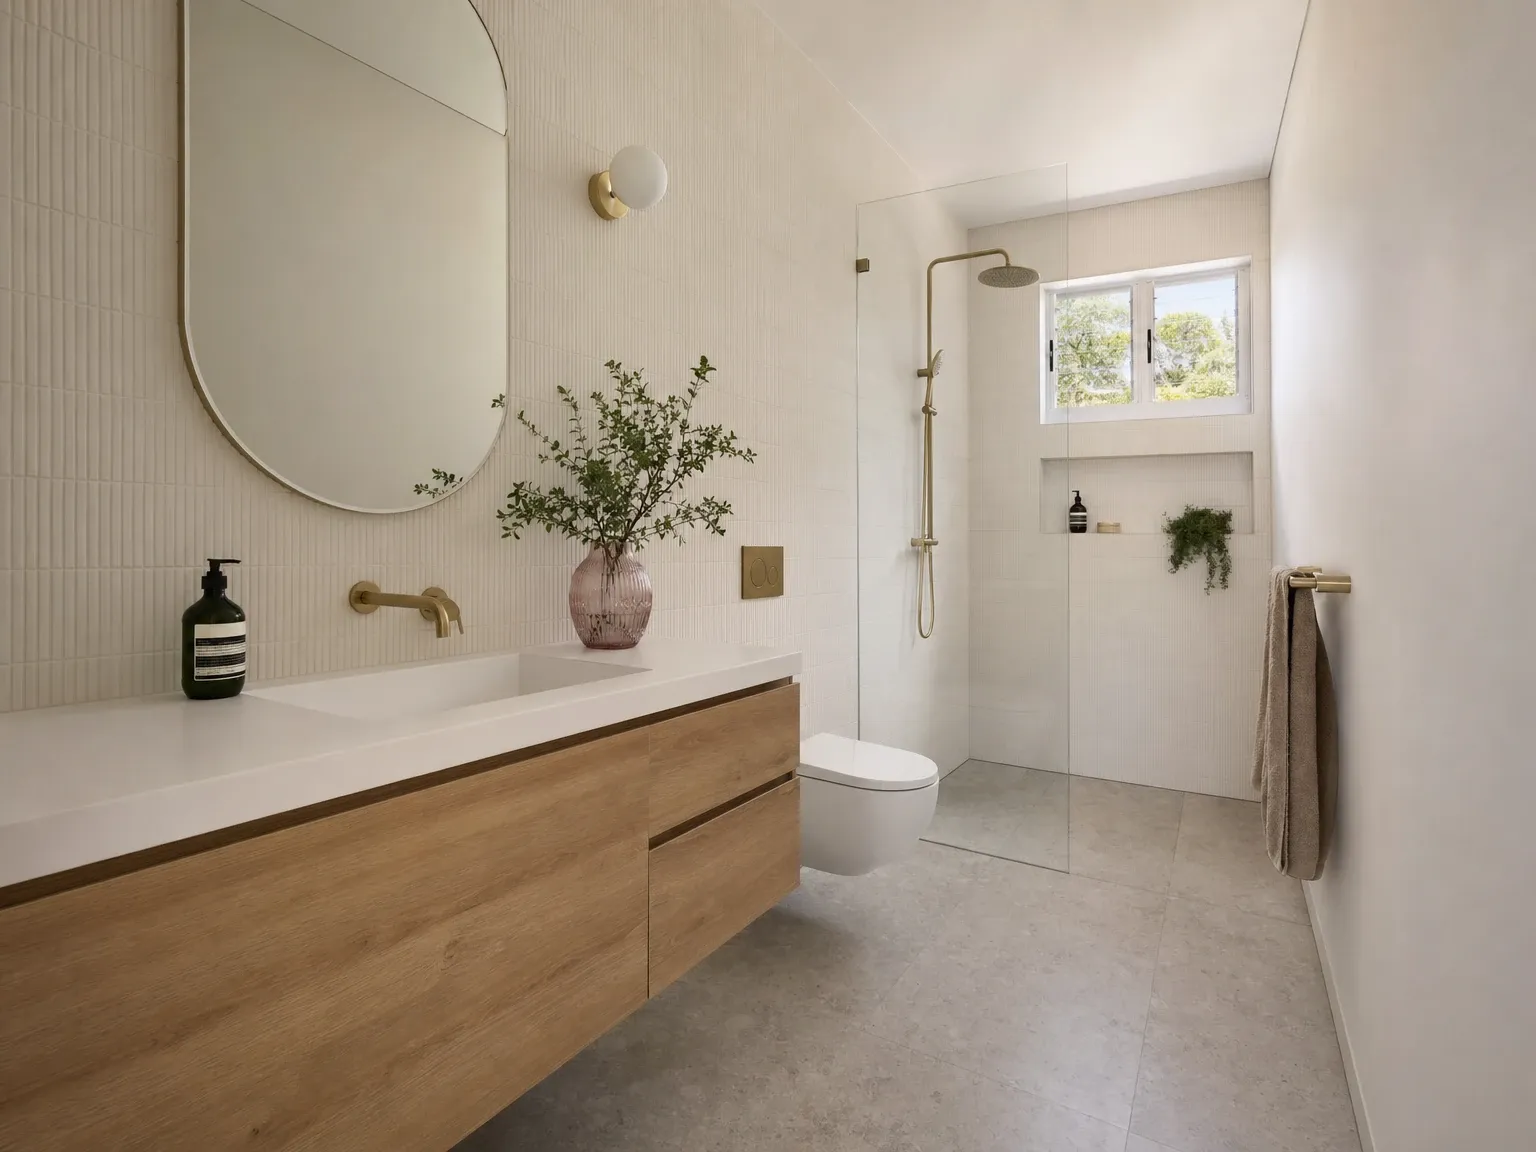
 Before
After
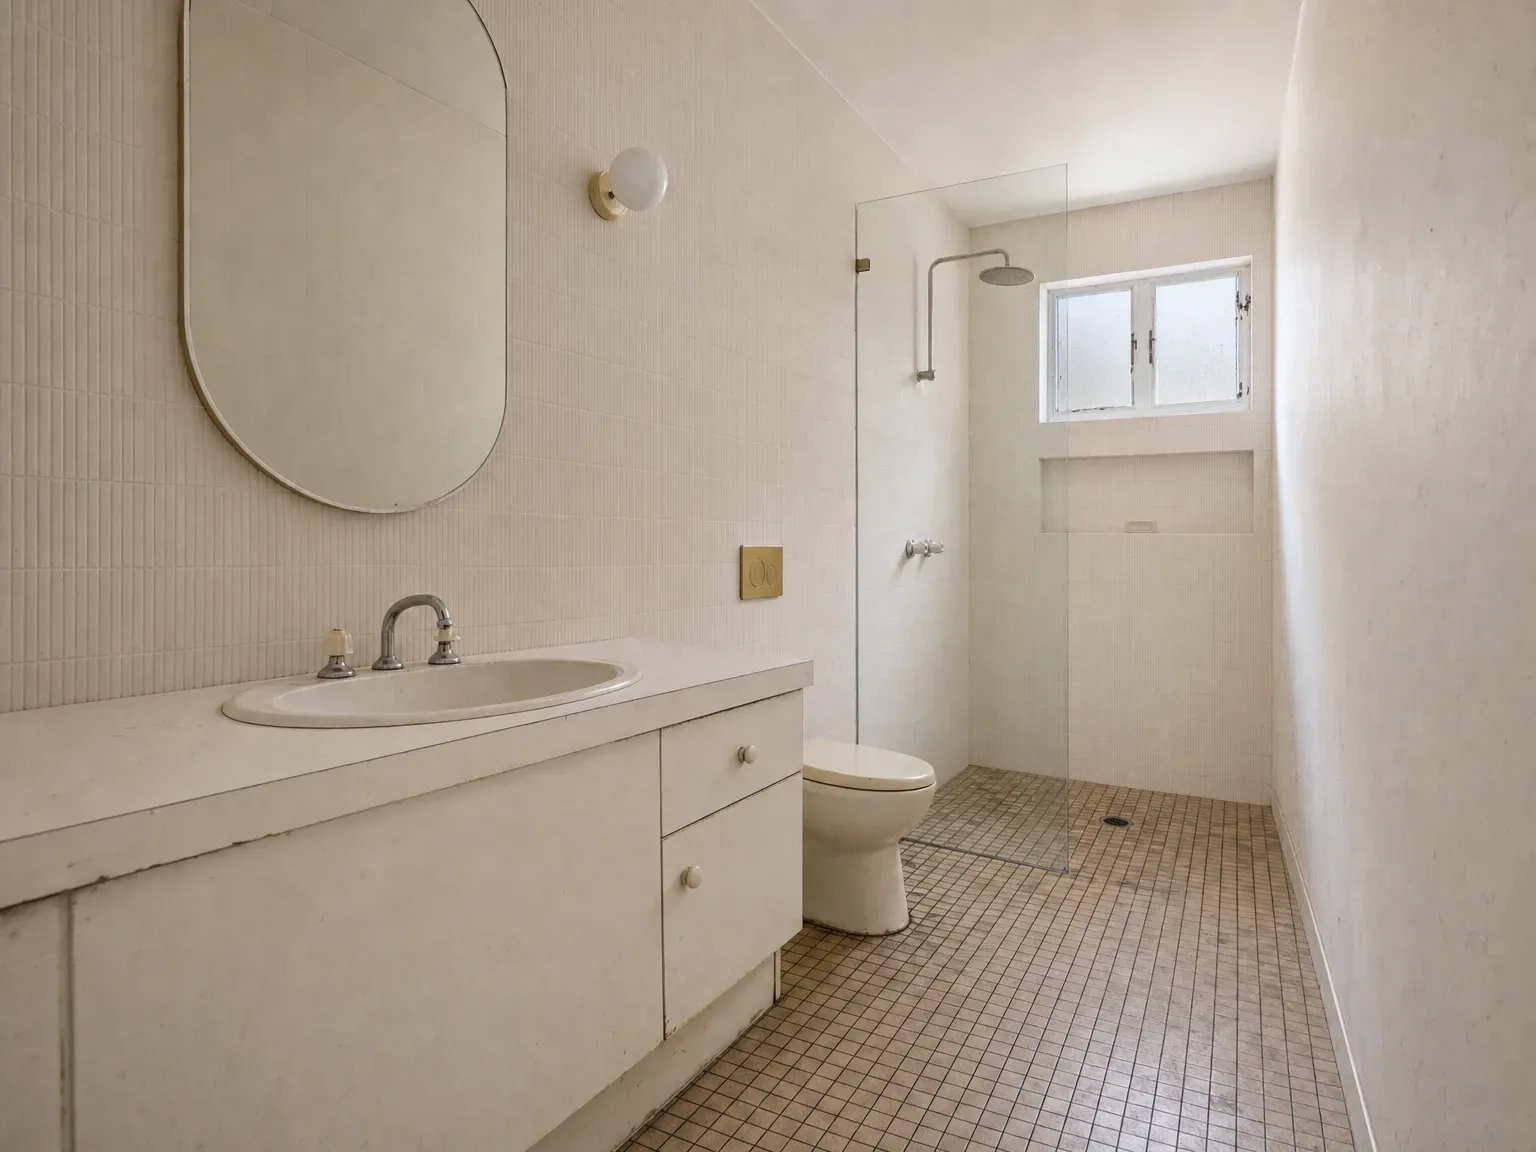
Before
After
Common layout mistakes that show up in finished bathrooms
The same handful of layout mistakes recur across thousands of Australian bathroom renovations. Each one is correctable on paper. Each one is significantly more expensive to fix in tile.
The first is forcing the layout the room cannot support. A 1.6 m wide room cannot fit a galley. A 4 m² bathroom cannot fit a separate bath and shower comfortably. The right answer is to pick a different layout, not to compress the fixtures past the clearance numbers. A bathroom where every fixture is 50 mm tighter than the convention will feel cramped in use, every day, for the next twenty years.
The second is moving the wet wall without budgeting for it. The plumber’s quote for a relocated layout is one of the most-underestimated line items in a bathroom renovation. If the budget cannot absorb the relocation cost without cutting the finishes budget, the layout stays put.
The third is swinging the door into the room when the room cannot afford it. An inward swing eats floor area, can trap a fallen user inside, and usually clips the vanity. A cavity slider or outward swing is almost always the right answer in a bathroom under 6 m².
The fourth is putting the toilet on the same sightline as the door. The toilet should be the last thing you see entering the bathroom, not the first. A nib wall or a position behind the door swing is the standard fix.
The fifth is forgetting the ventilation run. An internal bathroom with no window needs a duct run to the outside, planned at framing. Retrofitting it through finished ceilings is one of the more disruptive small jobs in a renovation. The layout should specify the duct path along with the fixture positions.
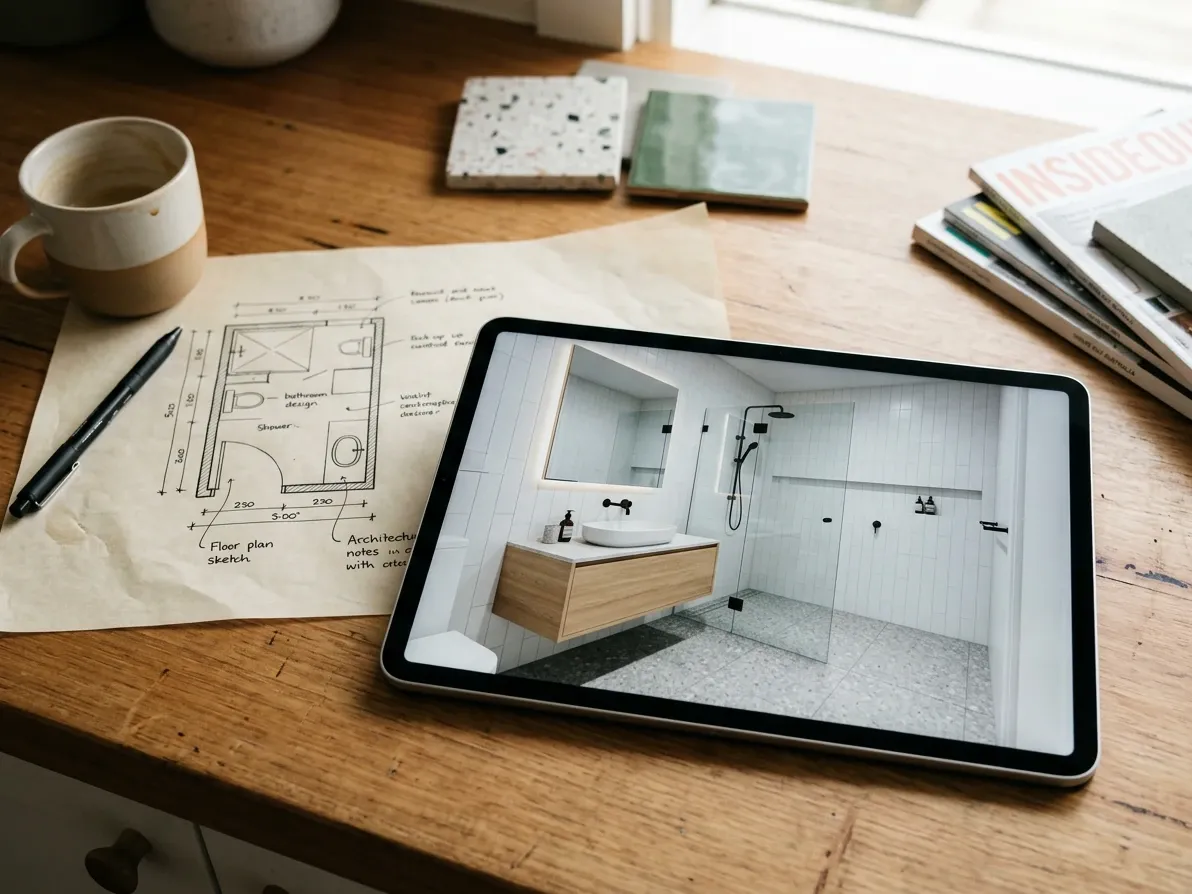
A 3D render tests the layout before any tile is ordered.
Test the layout before you tile
The cheapest way to discover that a bathroom layout does not work is to walk through it on paper. Sketch the room to scale, draw the fixtures in their clearance zones, walk the morning routine, check the door arc and the sightlines, then check it against the wet wall.
The second-cheapest way to test it is to visualise the finished room before any work begins. A 3D render of the proposed layout, with the actual room dimensions, the chosen fixtures and the materials in place, surfaces problems that a 2D floor plan never will: that the toilet is too close to the vanity in perspective, that the shower screen blocks the window light, that the hero tile reads completely differently on the floor than on the sample board. A 3D floor plan walks the room from any angle and tests the layout decisions in the finished context.
The most expensive way to test a layout is to build it and discover the problems in tile. Australian bathroom renovations are 80 to 90 per cent locked-in once waterproofing goes down. The decisions that matter most are made on paper, before the first trade walks in.
Frequently asked questions
What is the most common bathroom layout in Australia?
The three-in-a-row, where the vanity, toilet and shower sit along one wall in some order with the opposite wall left clear. It is the default layout in Australian apartments and townhouses, and a very common pattern in older detached homes built before about 1990. It only needs a single wet wall, which makes it the cheapest layout to plumb and the easiest to keep when renovating. Australian bathroom widths cluster between roughly 1.6 m and 2.4 m, and a three-in-a-row works in everything from the narrow end of that range upward.
What’s the minimum bathroom size in Australia?
There is no single legal minimum for a bathroom in the National Construction Code, but room dimensions still have to support the fixtures inside them. As a working planning floor, a powder room with toilet and basin only fits inside about 1.2 m by 1.2 m square or 1.4 m by 0.95 m rectangular. A full bathroom with shower, toilet and basin needs roughly 1.5 m by 1.8 m at the very compact end. Below those numbers the fixture clearances no longer work. The NCC does set a minimum finished ceiling height of 2.1 m for service areas like bathrooms, and the room must have either a window or mechanical ventilation that runs at 25 litres per second.
How wide does a bathroom need to be for a galley layout?
About 1.8 to 2.2 metres wall to wall. A galley puts fixtures on two opposing walls, so the room has to be wide enough to fit a vanity (450 to 600 mm deep) on one side, a shower or toilet on the other (about 900 mm of fixture depth), and a clear walkway down the middle of at least 900 mm. Add it up and the practical minimum is around 1.8 m. Anything narrower and the room tips back to a three-in-a-row on a single wall. Anything past about 2.4 m and an L-shape usually feels more generous than a long galley.
Does moving the toilet add a lot to the cost?
Yes, more than most people realise. Toilets connect to a 100 mm soil pipe that drops vertically through the floor structure to the sewer or stack, and that pipe runs at a fixed fall set by the original build. Moving the pan to a new wall means cutting the slab or joists, re-running the soil pipe at the required fall and re-tiling the path. On a freestanding house with timber floors, expect to add a plumber day and a tiler return visit, plus patching. On a concrete slab on ground it is significantly worse: cutting and re-pouring is structural work and may need an engineer. The wider rule of thumb in the trade is that keeping the existing layout costs 20 to 30 per cent less than a relocated layout for an equivalent finish.
Can I change my bathroom layout in a strata apartment?
Usually yes, but it is treated as a major renovation in New South Wales because it touches waterproofing. Under the NSW strata regime, anything involving waterproof membranes requires a special resolution of the owners corporation, which means a vote at a general meeting with at least 75 per cent support. Plan on six to twelve weeks of lead time for that process. Victoria is more relaxed: bathroom tiles and waterproofing membranes are generally treated as lot property rather than common property, so changes often need no owners corporation approval at all. Always check the building’s by-laws and the strata manager before you commit to a layout that moves plumbing.
What’s the minimum clearance around a toilet?
The accepted Australian planning rule of thumb is at least 450 mm from the centreline of the pan to the nearest side wall or fixture, giving an overall toilet zone of 900 mm wide. In front of the pan you want a minimum of 530 mm of clear floor, with 760 mm or more being comfortable. The toilet roll holder sits 200 to 300 mm in front of the pan and 600 to 800 mm above the floor. Skimping on these numbers is the most common reason a finished bathroom feels cramped: a few centimetres saved on toilet clearance translates directly into a room that does not work.
Should the bathroom door swing in or out?
Outwards if you can, inwards if you must. Australian guidance prefers outward-swinging or sliding bathroom doors because an inward swing eats roughly a square metre of floor inside the room and can trap a person on the floor inside. A common code trigger is the 1200 mm rule: if the gap between the toilet pan and the door is less than 1200 mm in front, the door should slide, be removable from outside, or swing outwards. In tight rooms a cavity slider is the cleanest answer because it reclaims the swing arc entirely. For accessibility a clear opening of at least 850 mm is the AS 1428.1 reference.
Do I need council approval to change the bathroom layout?
A like-for-like renovation in a freestanding home that keeps the existing layout, plumbing points and gas points usually does not need council approval, though the plumbing and electrical work always need licensed trades. You will need approval if you move plumbing through new walls, change a window, alter structure or add habitable floor area. Waterproofing always needs to be installed by a licensed waterproofer in line with AS 3740 and signed off. In strata, the owners corporation is the second approver: an NSW bathroom renovation touching waterproofing requires a special resolution before any work begins.