Kitchen renovation ideas: where to start
A practical kitchen renovation guide for Australian homeowners. Layout, budget, finishes, and the visualisation step that turns guesswork into confidence.
Where to start: the decision order that actually works
The Pinterest board is the wrong place to start a kitchen renovation. So is the showroom. Pretty pictures and benchtop samples both come later, after the harder decisions are locked in.
The right order is the order that prevents expensive rework. Start with how the kitchen will be used, then the layout that supports that, then the budget that the layout can be built inside, then the cabinetry and finishes that fit that budget. Trends and styling decisions are the last step, not the first.
This article walks through each of those decisions in order, with realistic Australian numbers and the questions to answer before you commit. By the end of it you will know what to brief a designer or cabinet maker on, what to spend money on and where to hold the line, and how to test the finished look before the first tile is ordered.
Decision 1: How you actually use the kitchen
Before you sketch a layout or pick a colour, write down how the kitchen gets used on a normal weekday and a normal weekend. Who cooks, who cleans, when there are two people in there at the same time, where the kids do their homework, where the dog’s bowl lives, what gets dropped on the bench when groceries come in.
This is the most undervalued part of the entire process. Cabinet makers cannot design a workflow they have not been told about. Most kitchens that “look great but do not work” were designed from a Pinterest mood board instead of a usage map.
Three questions are worth answering before anything else. First, what is the bench space you reach for daily and the bench space you never use, in your current kitchen? Second, what is the storage you wish you had, specifically (pull-out pantry, deep pot drawers, an appliance garage, a charging drawer, a recycling bay)? Third, where do conflicts happen: sink-to-stove paths that get blocked, doors that swing into each other, two cooks who cannot pass without dancing.
The answers shape every later decision. A household of four where one parent meal preps every Sunday needs a different bench-to-storage ratio than a couple who eats out four nights a week. Tell the designer, do not make them guess.
Decision 2: Layout
Australian kitchens cluster into five layouts. Choosing the right one is mostly a function of the room shape and how open you want it to feel to the rest of the home.
A single-wall layout puts everything along one wall. It is the cheapest to build because there is only one plumbing wall to deal with, and it works well in apartments and granny flats. The trade-off is bench space, which is always tight on a single wall.
A galley layout puts two parallel runs of cabinetry with a corridor between them. It is the most efficient layout for one cook because everything is within two paces, but two cooks struggle in a galley unless the walkway is generous. Aim for at least 1.2 metres between the two runs, ideally 1.4 metres.
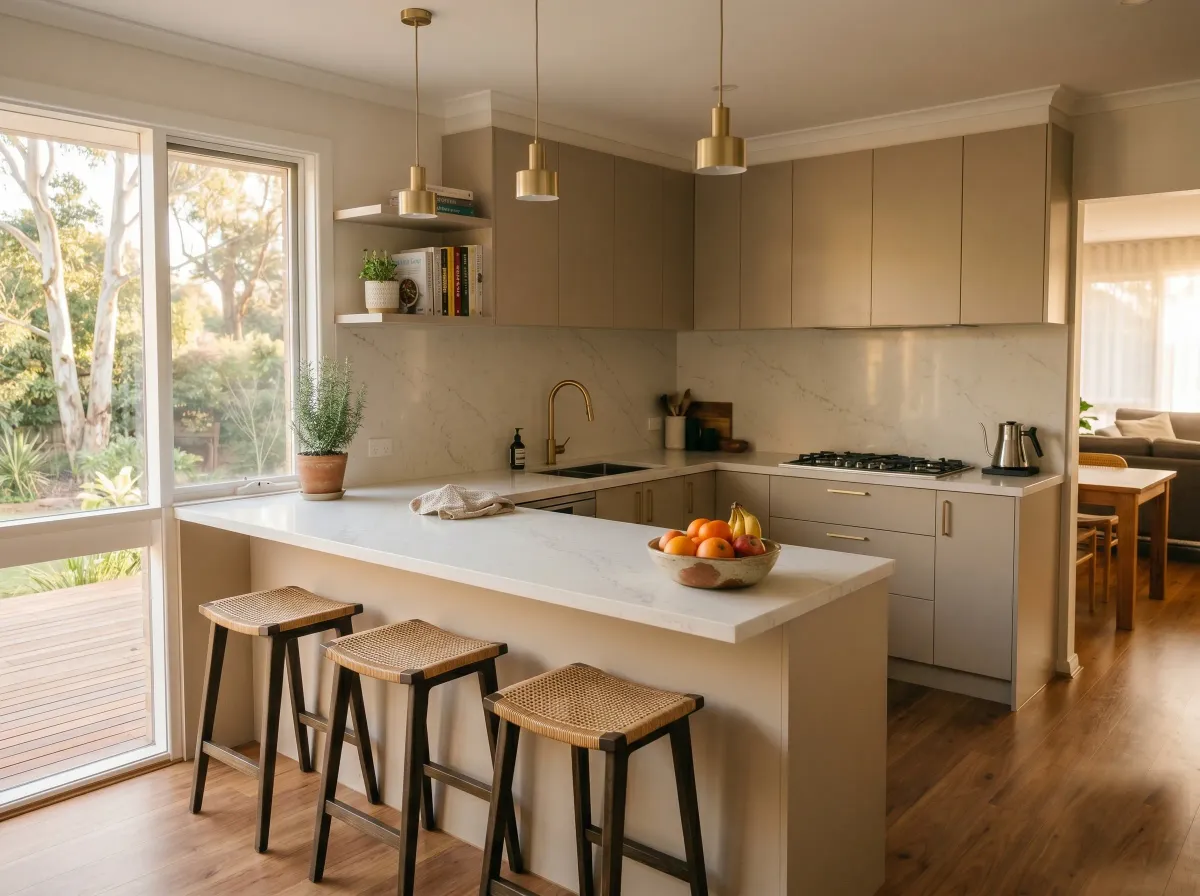
An L-shape uses two adjoining walls, opening the room to a dining or living space. It works in almost any sized kitchen and is the most flexible of the five.
A U-shape uses three walls. It gives the most bench space and the most storage per square metre, but it needs a generous footprint. In a small room a U-shape feels closed in.
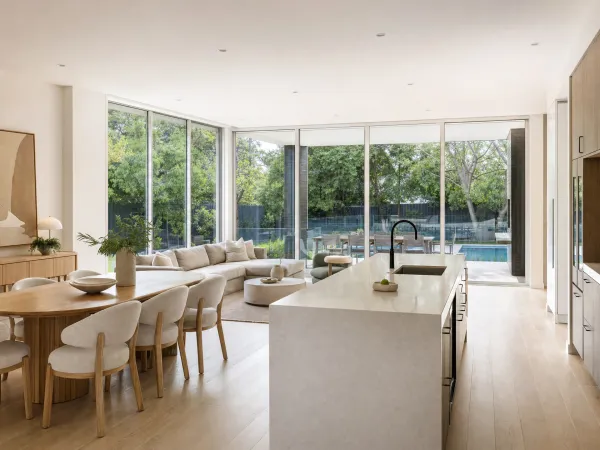
The fifth option is the open-plan kitchen with an island. The island does the work of the third wall in a U-shape, but it sits in an open room. It is the most popular layout in Australian renovations and the most expensive to design well. Island seating, a second sink, integrated power points and pendant lighting all add cost. An island also needs at least 1 metre of clearance on every side, ideally 1.2 metres, before it starts to feel functional.
A common mistake is forcing an island into a room that cannot carry one. If the clearance drops under a metre, the bench against the wall ends up unusable because no one can stand at it. A run-and-half-island compromise, where the island is short and asymmetric to the main run, often works better in narrow rooms.
If you are still deciding between layouts, a 3D floor plan helps you walk through each option before you commit. Two-dimensional plans hide circulation problems that become obvious the moment you see the room in three dimensions.
Decision 3: Budget and where the money actually goes
Australian kitchen renovation budgets break down into four broad tiers.
A cosmetic refresh sits at $8,000 to $20,000. That is repainting existing cabinetry, swapping handles, replacing the splashback, updating tapware and lighting, and sometimes a benchtop. The layout stays the same. The kitchen looks new but functions the same as before.
A budget renovation runs $12,000 to $25,000. New flat-pack cabinetry (Kaboodle, IKEA Metod, or similar), laminate benchtop, mid-range appliances, simple splashback. Often DIY-installed by a handy owner with a professional plumber and electrician booked for the connections.
A mid-range renovation sits at $25,000 to $45,000 and is what most Australian households end up doing. New cabinetry from a local custom maker, an engineered stone benchtop, quality but not premium appliances, a tiled or slab splashback, updated lighting. Layout might change slightly but rarely involves moving the sink or gas.
A premium renovation starts at $45,000 and runs past $80,000. Custom cabinetry with specialist joinery details, premium stone or natural-stone benchtop, integrated European appliances, designer tapware, considered lighting design, and often a second prep zone or scullery.
Inside any of those budgets, the proportions are remarkably stable. Cabinetry takes 30 to 40 per cent. Labour across all trades takes 40 to 50 per cent. Benchtops are 8 to 15 per cent. Appliances are 10 to 20 per cent. Tiling, splashbacks, tapware and lighting share the remainder.
Two things move the total fastest. Moving plumbing or gas adds rough-in, patching and re-tile costs and often two extra trade days. Choosing premium appliances pushes the appliance line from 10 per cent of a $30,000 build to 25 per cent of a $45,000 build before you blink.
The single most useful budget number is the contingency: 10 to 15 per cent on top of the quoted total, held back for the surprises that any renovation in a real Australian home will throw at you. Pre-1990 homes especially benefit from a 20 per cent buffer, because around one in three Australian homes built before 1990 contains asbestos, and anything you open up may need to be assessed and removed by a licensed contractor before work continues.
For a deeper look at where the money actually moves across an Australian renovation, the HIA’s housing industry data tracks cost trends quarterly. A more detailed cost breakdown for kitchen-specific work, and the cosmetic versus full-renovation maths, is in the kitchen renovations on a budget guide.
Decision 4: Cabinetry, the line item that decides the kitchen
Cabinetry is the largest spend and the longest lead time, so it deserves the most thought. The choice splits three ways: flat-pack, semi-custom, and fully custom.
Flat-pack from Kaboodle, IKEA or Bunnings runs $3,000 to $8,000 in materials for a standard kitchen. You assemble and install yourself, or pay a handyman a day or two. The carcasses are decent, the doors are competent, and the standard sizing is fine in most rectangular rooms. Where flat-pack falls short is bespoke fit. Anything non-standard (a wider end panel, a tall pantry filler, a curved corner) needs to be cobbled together.
Semi-custom cabinetry from a local cabinet maker runs $10,000 to $25,000. The carcasses are usually a standardised module system but the doors, fronts and finishes are made to order. Internal fit-outs (pull-out pantries, soft-close mechanisms, charging drawers, recycling bins) come from German hardware brands like Blum or Hettich and lift the perceived quality immediately.
Fully custom cabinetry from a joiner runs $25,000 to $60,000 and up. Every carcass is built to fit the exact room. This is where you go if the kitchen has weird angles, exposed timber posts, a sloped ceiling, or you want something genuinely unusual.
Door materials matter more than most people realise. Two-pack polyurethane (sometimes called 2pac) is the standard mid-range door, a painted finish on MDF, and looks tidy for ten years if cleaned reasonably. Thermofoil is cheaper but the laminate edges lift over time, especially near the dishwasher and oven. Solid timber doors look beautiful but expand and contract in Australian climate swings, particularly in coastal homes. Laminate has come a long way and good-quality woodgrain laminate now looks indistinguishable from veneer at arm’s length.
Two design choices that have a disproportionate effect on the finished look: drawer fronts instead of cabinet doors for everything below the bench, and handle-less fronts using J-pulls or push-to-open mechanisms. Both add about 10 per cent to the cabinetry cost but completely change the feel of the kitchen.
Decision 5: Benchtops, splashbacks and the visible finishes
Benchtops carry the kitchen visually. There are four real options in 2026.
Engineered stone dominated Australian kitchens for two decades, but the regulatory landscape has shifted. From 1 July 2024, Safe Work Australia prohibited the manufacture, supply, processing and installation of all engineered stone benchtops, slabs and panels in response to the silicosis crisis among stonemasons. Existing installations can stay, but new kitchens have moved on. The dominant replacements in 2026 are porcelain slab (often called sintered stone, with brands like Dekton, Neolith and Laminam) at $600 to $1,200 per square metre installed, and ceramic or solid-surface materials at a similar price point. Porcelain looks visually close to the old engineered stone and is more heat and scratch resistant, but it is harder to fabricate, so installers are still pricing it cautiously.
Natural stone (marble, granite, dolomite) costs more, typically $900 to $1,800 per square metre installed, and behaves differently. Marble etches with lemon juice and red wine, granite is harder and more forgiving, dolomite sits in between. If you genuinely love the look of natural stone and accept the patina, it ages beautifully. If you want it to look new in ten years, choose engineered.
Laminate benchtops from Laminex, Polytec or Formica run $150 to $400 per square metre installed. The aesthetic gap between laminate and stone has narrowed dramatically; high-quality stone-look laminate looks excellent in photographs and at conversational distance. The difference shows up close, in heat resistance, and in the way joins are handled.
Solid timber benchtops bring warmth that no engineered material matches. They need oiling every six to twelve months and will mark, but the marks become character. Best as an accent (an island bench in timber against stone runs around the perimeter) rather than the whole kitchen.
Splashbacks have three good options. Subway tiles in white or cream remain the most defensible choice and the cheapest at $80 to $150 per square metre installed. A continuous slab splashback that runs from benchtop to underside-of-overheads, in the same stone as the benchtop, is the upgrade move and instantly modernises a kitchen. Coloured or patterned tiles can lift a kitchen but date faster, so choose with care.
Tapware is the jewellery of the kitchen. Brushed brass, gunmetal and matte black have replaced chrome at the premium end. A quality tap from Sussex, Brodware or Astra Walker runs $400 to $1,200; a budget pull-out from Bunnings runs $150 to $300 and works fine. The visible difference is in the finish quality and how the cartridge feels after five years of use, not in day-one looks.
Decision 6: Lighting, power and the things people forget
The single biggest lighting upgrade in a modern Australian kitchen is dedicated task lighting under every overhead cabinet. LED strip lights on a separate switch transform the bench from a shadow zone to a usable workspace. Cost is low, around $300 to $600 across a standard kitchen, and the difference at night is dramatic.
Pendant lights over an island anchor the room visually. Two or three pendants in proportion to the island length, hung 750 to 900 millimetres above the bench, is the standard. Choose pendants that throw light downward; decorative pendants with exposed bulbs look pretty but make poor task lights.
Power points get neglected in every kitchen brief. The new normal is more than you think you need. Plan for two double power points on the island for blenders, kettles and laptops; two doubles along the main bench for small appliances; one in the pantry for charging cordless vacuums; and a dedicated outlet inside an appliance garage if you have one. Hidden pop-up power points on the island look elegant but add $400 to $800 each and break more often than fixed outlets.
Storage details that matter: a deep pot drawer under the cooktop instead of cupboards, a pull-out bin and recycling system in the cabinet next to the sink, soft-close on every door and drawer (not some of them), and an appliance garage with a roller door for the kettle, toaster and coffee machine. None of these are visible in the showroom photographs but all of them change daily life in the finished kitchen.
Rangehoods are where Australian regulations sometimes catch homeowners off-guard. Recirculating rangehoods are quieter and cheaper to install but do not actually remove cooking smells or steam, they filter and recycle. Ducted rangehoods exhaust to outside and are the only real option for a serious cook. In apartments and older homes, ducting through walls or ceilings may not be possible, which forces the recirculating compromise.
2026 trends worth paying attention to
Trends in kitchen design move slowly. The 2026 trends that have real staying power, rather than the ones that will look dated by 2028, are mostly evolutions of what was already working.
Warm neutrals have replaced cool greys. Mushroom, oat, putty and soft sage have moved into cabinetry colours that would have been white or grey five years ago. The change works because warm tones flatter Australian natural light, which is harsher than European or American light and exposes cool greys as flat.
Larger islands keep growing. The island as the social heart of the kitchen is now standard in any renovation that has room for one. Two-tier islands, where one side is bench height for prep and the other is bar height for seating, are out. A single-height island with proper bar seating along one side is in.
Integrated appliances continue to take share. Fridges, dishwashers and microwaves panelled to match the cabinetry create a calmer visual line. The cost premium for integrated appliances over freestanding is real ($1,500 to $3,000 extra per appliance) and worth it only if you are committed to the minimalist look across the whole kitchen.
Mixed materials, particularly stone benchtops paired with timber accents, have settled in as the dominant high-end aesthetic. Done well it looks layered and considered. Done badly it looks like the designer could not commit to one direction.
Trends to ignore: high-gloss white cabinetry, which Australian climate fingerprints relentlessly; copper tapware, which is past peak and ages unevenly; concrete benchtops in residential settings, which stain badly and require constant resealing; and any colour that requires a specific lighting condition to look right.
Testing your renovation before you build it
This is the step most homeowners skip and the one that prevents the largest regret. Before you order cabinets, lock in a benchtop or commit to a tile, you can see the finished kitchen as a photorealistic image.
A 3D render takes the existing kitchen as a photo (taken on your phone), and shows it with the proposed cabinetry, benchtop, splashback, tapware and lighting in place. You see the kitchen as it will look, in the actual room, with the actual light. Decisions that are abstract on a sample board become obvious in a 3D render. A benchtop that looks dark in a 50-millimetre offcut looks completely different across three metres of bench. A splashback tile that looks busy on a sample card looks calm on a wall, or vice versa.
The visualisation step is what separates a kitchen renovation that lands as planned from one that delivers a surprise. Most homeowners cannot read a 2D plan with any confidence; cabinet makers can, but the cabinet maker is not the one who has to live with the finished kitchen. A 3D render closes that gap.
Architectural visualisation studios traditionally charge $500 to $1,500 per 3D render and quote turnaround in weeks. reIMG produces 3D renders from a phone photo and a written brief, with turnaround in 24 hours and pricing fixed per image. For a planning-stage kitchen renovation, that means seeing three or four variations of cabinet colour, benchtop and splashback combinations side by side before any money changes hands at the showroom.
This is the cheapest insurance available against a kitchen you do not love after spending $40,000 on it.
The order of trades and how long it takes
A kitchen renovation runs through a fixed sequence of trades. Knowing the order helps you sanity-check a builder’s timeline and spot when something is slipping. Houzz Australia’s 10-step renovation timeline is a useful longer reference once you have a quoted scope.
Week zero is design lock-in and ordering. Cabinetry has the longest lead time, typically four to eight weeks for custom and one to two weeks for flat-pack. Stone benchtops take one to two weeks from template to installation. Appliances should be ordered as soon as the design is locked, because backorders on European brands routinely run six to ten weeks.
Week one is demolition and removal. The plumber and electrician disconnect the existing sink, dishwasher, cooktop, oven and any hard-wired appliances. Old cabinetry is stripped out. Old tiles come off if the splashback is changing. This is also when any asbestos in pre-1990 homes is identified and a licensed removalist is engaged before any further work continues.
Week two is rough-in. Plumber moves pipes, electrician moves and adds power points and lighting cables, gas fitter relocates the gas point if needed. Walls are patched. The room is painted if it is going to be painted.
Week three is cabinetry installation. Cabinet maker brings carcasses, installs and levels, hangs doors and drawer fronts. The kitchen starts to look real for the first time.
Week four is benchtop. The stonemason templates against the installed cabinetry, manufactures, and returns to install. Splashback tiling or slab installation happens after the benchtop is in.
Week five is final connections. Plumber returns to install sink, tap and dishwasher. Electrician returns to wire in appliances, install lighting, switch on power points. Final clean.
That is the smooth version. In reality a renovation is six to twelve weeks elapsed because cabinetry lead times, weather, trade availability and the inevitable variation slow things down. Plan for the longer window and treat anything faster as a bonus.
Council approval is the wildcard. A like-for-like renovation that keeps the existing footprint, plumbing and gas usually does not need approval. Anything structural (removing a wall, relocating the gas, changing the building outline) needs a building approval from the local council and adds four to eight weeks before site work can start.
Mistakes that wreck Australian kitchen renovations
Five mistakes recur often enough to call out specifically.
The first is starting with finishes instead of function. The Pinterest board does not know how you cook. Decide the layout, then the cabinetry, then the finishes. In that order.
The second is moving the sink, cooktop or fridge without a strong reason. Each relocation adds trade days, plumbing or gas work, and patching. A kitchen that uses the existing services positions cleverly is almost always cheaper and faster than one that rearranges them.
The third is underestimating storage. Most homeowners describe their current kitchen as short on storage; most then design a new kitchen that adds less than they need. A proper audit of what is currently on the bench (because it has nowhere else to go) is the cheapest design tool there is.
The fourth is buying cheap appliances inside a premium kitchen. The appliance is the part you interact with daily. A $400 cooktop in a $50,000 kitchen telegraphs the compromise. A $1,200 cooktop with quality knobs and burners disappears into the rest of the design.
The fifth is signing off on a 2D plan without ever seeing the room in three dimensions. Plans hide circulation problems, scale problems and proportion problems that become obvious the moment the kitchen exists in three-dimensional space. A 3D render or a 3D floor plan is the cheapest way to surface these problems while they are still cheap to fix.
A bonus mistake worth flagging: choosing the cabinetmaker last, after the design is “finalised”. Good cabinet makers shape the design through their material and joinery knowledge. The right time to bring the cabinet maker in is during the layout decision, not after it.
Frequently asked questions
How much does a kitchen renovation cost in Australia in 2026?
A cosmetic refresh sits around $8,000 to $20,000. A budget renovation with flat-pack cabinetry runs $12,000 to $25,000. A mid-range renovation with new cabinetry, a stone benchtop and quality appliances sits at $25,000 to $45,000. Premium kitchens with custom joinery start at $45,000 and run past $80,000. Sydney typically runs 15 to 18 per cent above the national average, Adelaide and Hobart sit around 5 to 10 per cent below.
What is the first step in a kitchen renovation?
Map how you actually use the kitchen before you decide anything else. Where the prep happens, where two people get in each other’s way, what storage is missing, what appliances earn their space. Layout, budget and finishes all follow from that. Choosing tiles first is the most common way to end up with a beautiful kitchen you do not enjoy cooking in.
How long does a kitchen renovation take in Australia?
Most kitchen renovations take six to twelve weeks from design lock-in to a working kitchen, with on-site work usually running two to four weeks. Cabinetry lead times of four to eight weeks for custom joinery sit inside that window. Add time for council approval if you are moving structural walls or relocating gas.
What is the most expensive part of a kitchen renovation?
Cabinetry. It typically accounts for 30 to 40 per cent of the total budget. Labour is the second biggest line at 40 to 50 per cent of the build cost across trades. Stone benchtops, integrated appliances and any layout change that moves plumbing or gas are the next three lines that move the total fastest.
Do I need council approval for a kitchen renovation?
A like-for-like renovation that keeps the existing layout, plumbing and gas points usually does not need council approval. You will need approval if you are removing or altering structural walls, relocating gas or plumbing through new walls, or changing the building footprint. Always confirm with your local council before work starts.
Can I save money by keeping the existing layout?
Yes, and this is the single biggest lever. Moving the sink, cooktop or dishwasher means re-routing plumbing, gas and power, which adds trade days, materials and often patching. Keeping the layout but upgrading cabinetry, benchtop, splashback and appliances can cut total cost by 20 to 30 per cent without compromising the finished look.